Colorful language flows from the fingertips, as it does from the lips of this spouse-made farm girl, but in this crazy life we all need some colorful discussion to distract us from our own, everyday craziness! In here, we do DIY, farm life, and a lot more!
As an Amazon Associate, I earn from qualifying purchases. Clicking on certain images and links will direct you to where you can purchase the pictured item on Amazon.
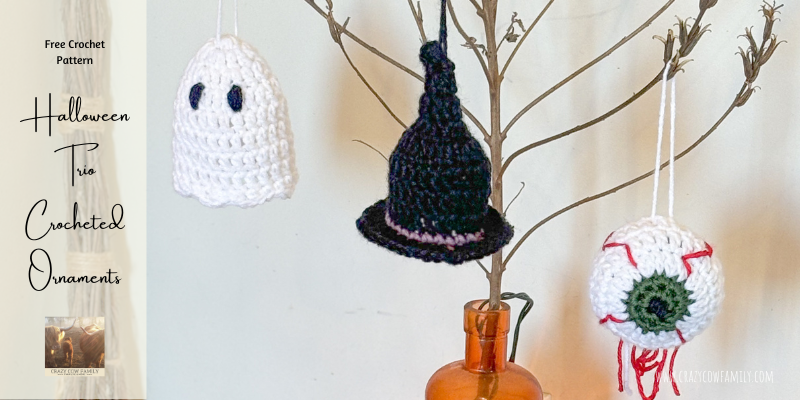
Halloween Trio Crocheted Ornaments
A Not-Too-Scary Project
This one’s a fun one – super fast, which is my favorite kind because I need instant gratification! No joke, in less than 2 hours I had these babies hanging in my mudroom, and finding the right branch to hang them on took longer than the crocheting. If you’re stuck in a crochet rut (don’t pretend this isn’t a thing), give these little cuties a try. I included some links to the items necessary to complete this project, but honestly, I used scraps that I already had in my mess of a yarn bin. The crochet hook I used isn’t the one I left a link to, but I ordered a set of these baddies for myself because they look oh so comfortable! This pattern is great for a beginner to try their hand at shaping and working in the round, and can be a quick and easy project for an advanced crocheter. Don’t wait to give this pattern a go…Halloween will be here before you know it!
Here’s What You’ll Need:
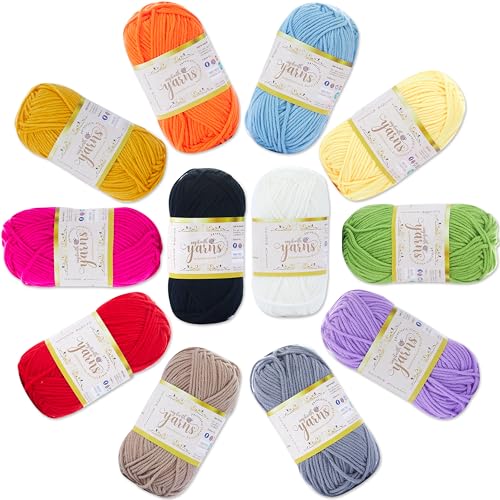
- Worsted weight yarn in white, black, red, green, and purple
- Size H, 5.00 mm crochet hook
- Scissors, a yarn needle and stuffing (the stuffed animal kind, not the yummy Thanksgiving kind)
The Language of Crochet:
- MC: Magic Circle
- DC: Double Crochet
- SL: Slip Stitch
- SC: Single Crochet
- Dec.: Decrease (DC or SC 2 stitches together)
- CH: Chain
- (#): Stitch Count
Notes:
- This design is NOT worked in a continuous round. Each round is joined by a slip stitch through the first stitch of that round for a clean, level finish.
- Weaving in the Magic Circle tail before finishing all the rounds makes it an easier task.
- Dec. is simply, DC or SC 2 together.
- Finished dimensions are, roughly, 3.5″-5″ H x 3.5″ W.
- Keep your old pillows to re-use the stuffing in projects like this!
Monster’s Eyeball
Round 1: Using black, 3 SC into a MC Connect with SL to 1st SC. (3)
Round 2: Attach iris color. CH 1, 3 SC in each SC around. Connect with SL. (9)
Round 3: CH 1, 2 SC in each stitch. Connect with SL. (18)
Rounds 4: Attach white. CH 2, 2 DC in CH stitch, 1 DC in the next stitch, *2 DC in the next stitch, 1 DC in the next stitch.* Connect with SL. (27)
Rounds 5-7: CH 1, 1 SC in each stitch. Connect with SL. Tie off loose ends on the inside of the eye. (27)
Round 8: CH 2, 1 DC in CH stitch, Dec, *1 DC in next stitch, DC Dec.* Connect with SL. Add stuffing. (18)
Round 9: CH 2, DC Dec all the way around. Connect with SL. (9)
Round 10: CH 1, Starting with CH stitch SC Dec 4 times, 1 SC in the final stitch. Connect with SL (5)
Round 11: Cut the working end long enough to weave in and out of each stitch and pull tight, finish off.
Blood Streaks:
Using red, thread a piece of yarn still attached to the skein. Starting at the back of the eye, push the needle through to the front near the edge of the iris. Stitch zig-zags from the front of the eye, ending through the back where you started. Knot the starting end and the working end, and cut.
Finishing:
Finish by knotting together all the loose ends at the back of the eye, 2 at a time, to secure them. Leave the red ends hanging like veins/connective tissue, or stuff them into the eye.
Witch’s Hat
Round 1: Using black, 3 SC into a MC Connect with SL to 1st SC. (3)
Round 2: CH 2, 2 DC in CH stitch, 1 DC in the next 2. Connect with SL. (4)
Round 3: CH 2, 2 DC in CH stitch, 1 DC in the next 2, 2 DC in the last stitch. Connect with SL. (6)
Round 4: CH 2, 2 DC in CH stitch, 1 SC in the next 2, 1 DC in the next 2, 2 DC in the last stitch. Connect with SL. (8) Turn inside out and weave in the starting end.
Round 5: CH 2, 2 DC in CH stitch, *1 DC in the next, 2 DC in the next,* 1 DC in the last stitch. Connect with SL. (12)
Round 6: CH 2, 2 DC in CH stitch, *2 DC in each stitch around.* Connect with SL. (24)
Rounds 7-9: CH 2, 1 DC in each stitch around. Connect with SL. (24)
Round 10: Using purple, CH 1, SC in each stitch around. (24) DO NOT CUT/DISCONNECT BLACK!
Round 11: Using black again, CH 2, 2 DC in each stitch around IN FRONT LOOP ONLY. Connect with SL. (48)
Finish off and weave in ends.
Flying Ghost
Round 1: Using white, 6 SC into MC. Connect with SL. (6)
Round 2: CH 2, 2 DC in each stitch around. Connect with SL. (12)
Round 3: CH 2, 2 DC in CH stitch, 1 DC in the next, *2 DC in the next, 1 DC in the next.* Connect with SL. (18)
Round 4: CH 2, 2 DC in CH stitch, 1 DC in the next 2, *2 DC in the next, 1 DC in the next 2.* Connect with SL. (24)
Rounds 5-8: CH 2, 1 DC in each stitch around. Connect with SL. (24)
Round 9: CH 2, DC in CH stitch, 1 SC in the next 2, CH 2, *1 DC in the next, 1 SC in the next 2, CH 2,* omit CH 2 after the final SC. Connect directly to top of first DC with SL. (24)
Finish off and weave in ends.
The Finished Product:
Mooooowahaha! In under 2 hours you have yourself a cute little set of Halloween decorations to hang from any ol’ branch.
I like to gift these to friends who have little ones, and they’re sturdy enough to be played with. Obviously, you can swap out the iris color of the eyeball or the stripe color in the hat for whatever colors suit your needs.
Have fun with this and feel free to shoot me an email with a picture of your finished product, or to request the PDF version…free for a limited time!
Happy crocheting!